Timeline Settings
The following explains the settings contained within the Map by Query & Map by Attachments page blocks from the Mapping Module, in order to build your timeline on a page.
These screen shots were taken from the faculty project site, American Environmental History 225 Fall 2021.
"Default View" settings
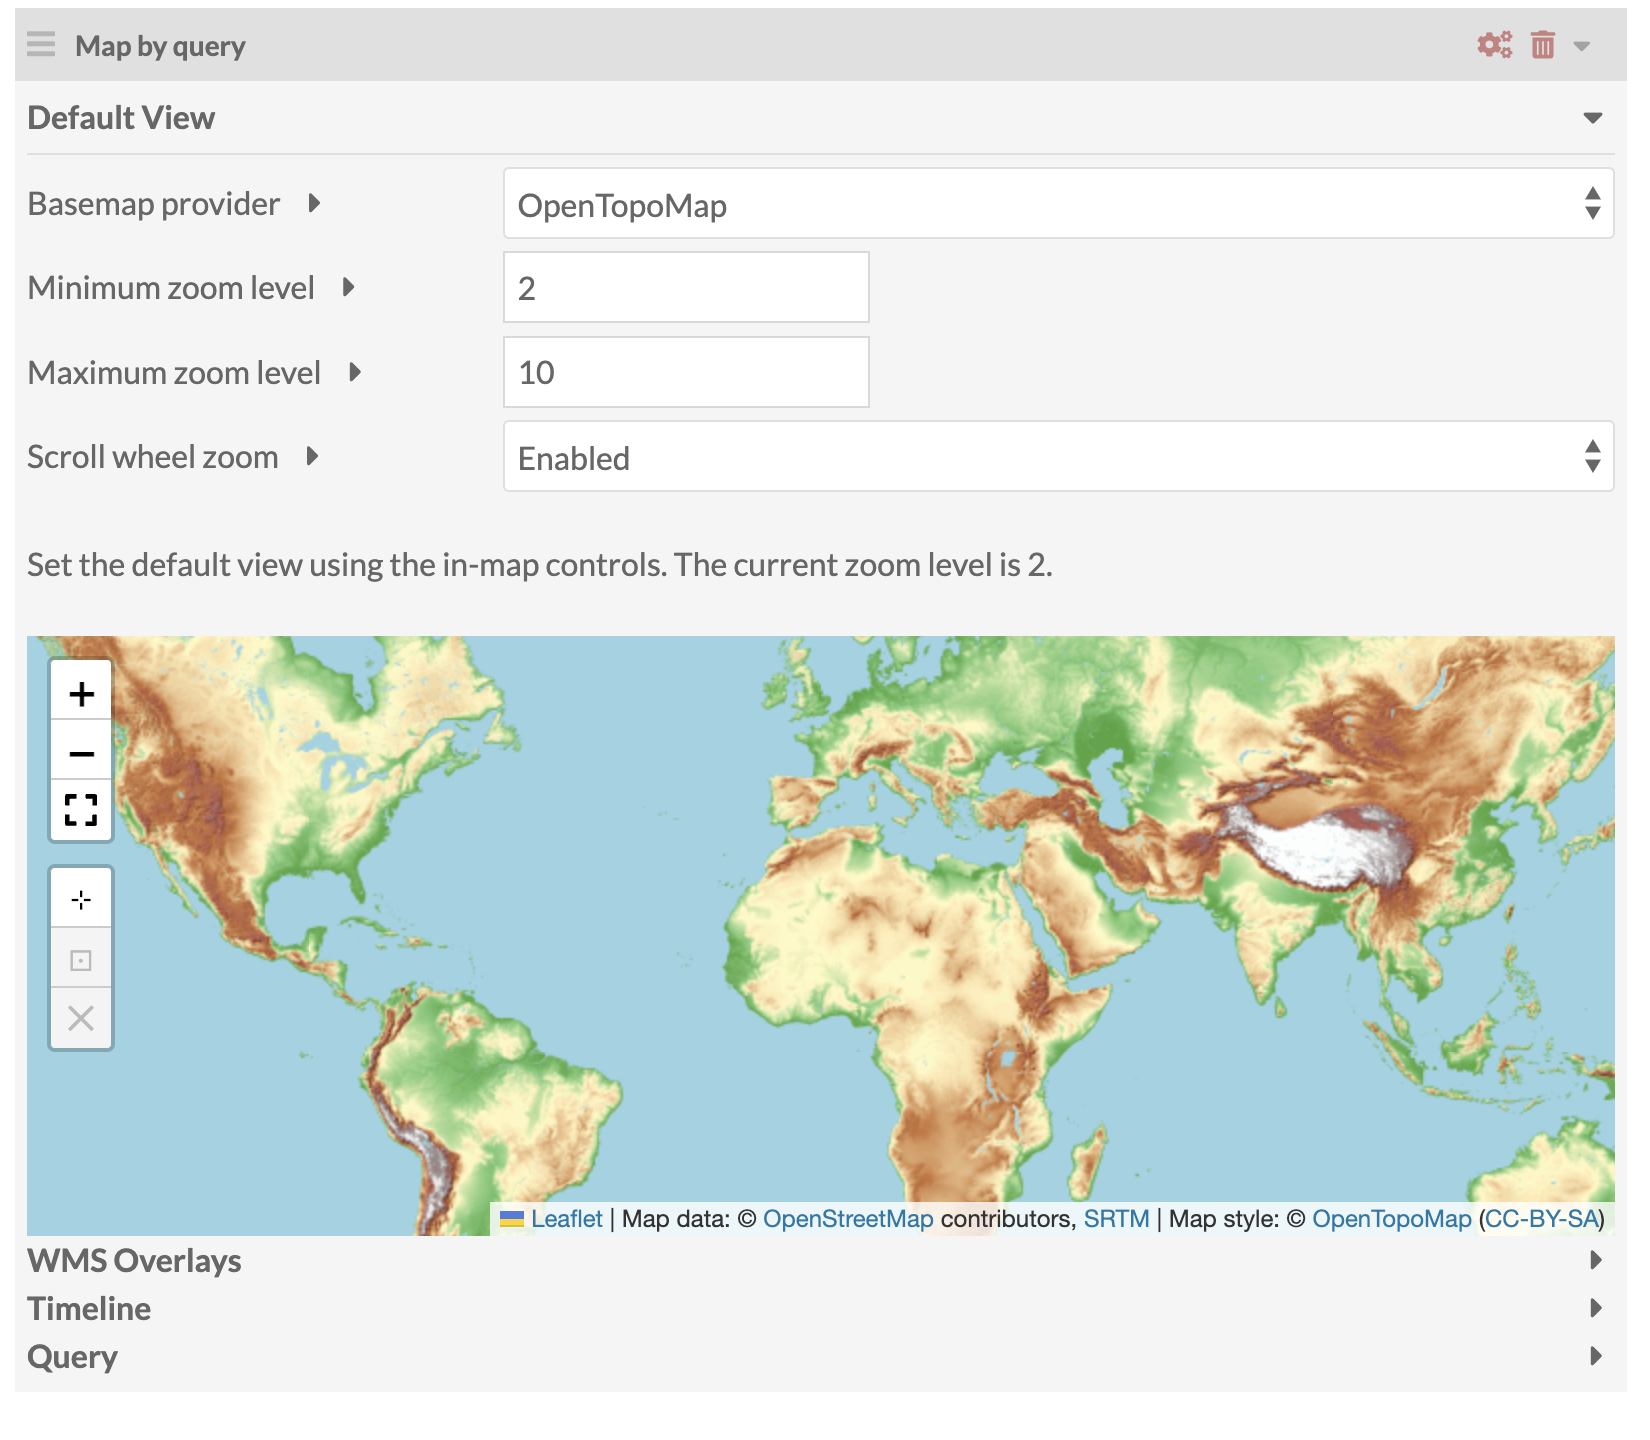
Basemap provider*
You can choose from a variety of map style overlays from the basemap provider dropdown list. *Please be aware that some options may no longer render available.
Minimum & Maximum Zoom Levels
When visitors toggle between two points on your map, an animation will zoom in and out from one point to the other, depending on what you set the minimum & maximum zoom levels to be. The default minimum level is zero. You can play around with the numbers and test your map until you acheive a desired movement. Check out this timeline, whose zoom levels were set at 2 and 10.
Scroll Wheel Zoom
Set whether users can zoom with their mouse wheel when hovering over the map, either automatically upon page load or after clicking inside the map.
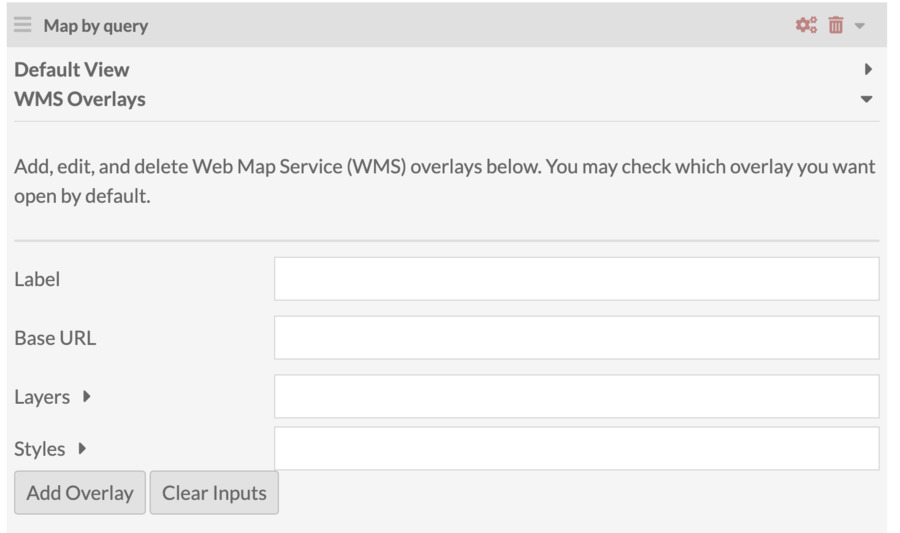
WMS Overlays
This is only for advanced users who want to use a different map overlay than what is provided in the Basemap provider dropdown list in the Default View settings. Here is an extensive list of steps to take if you want to proceed with WMS Overlays.
Timeline Settings
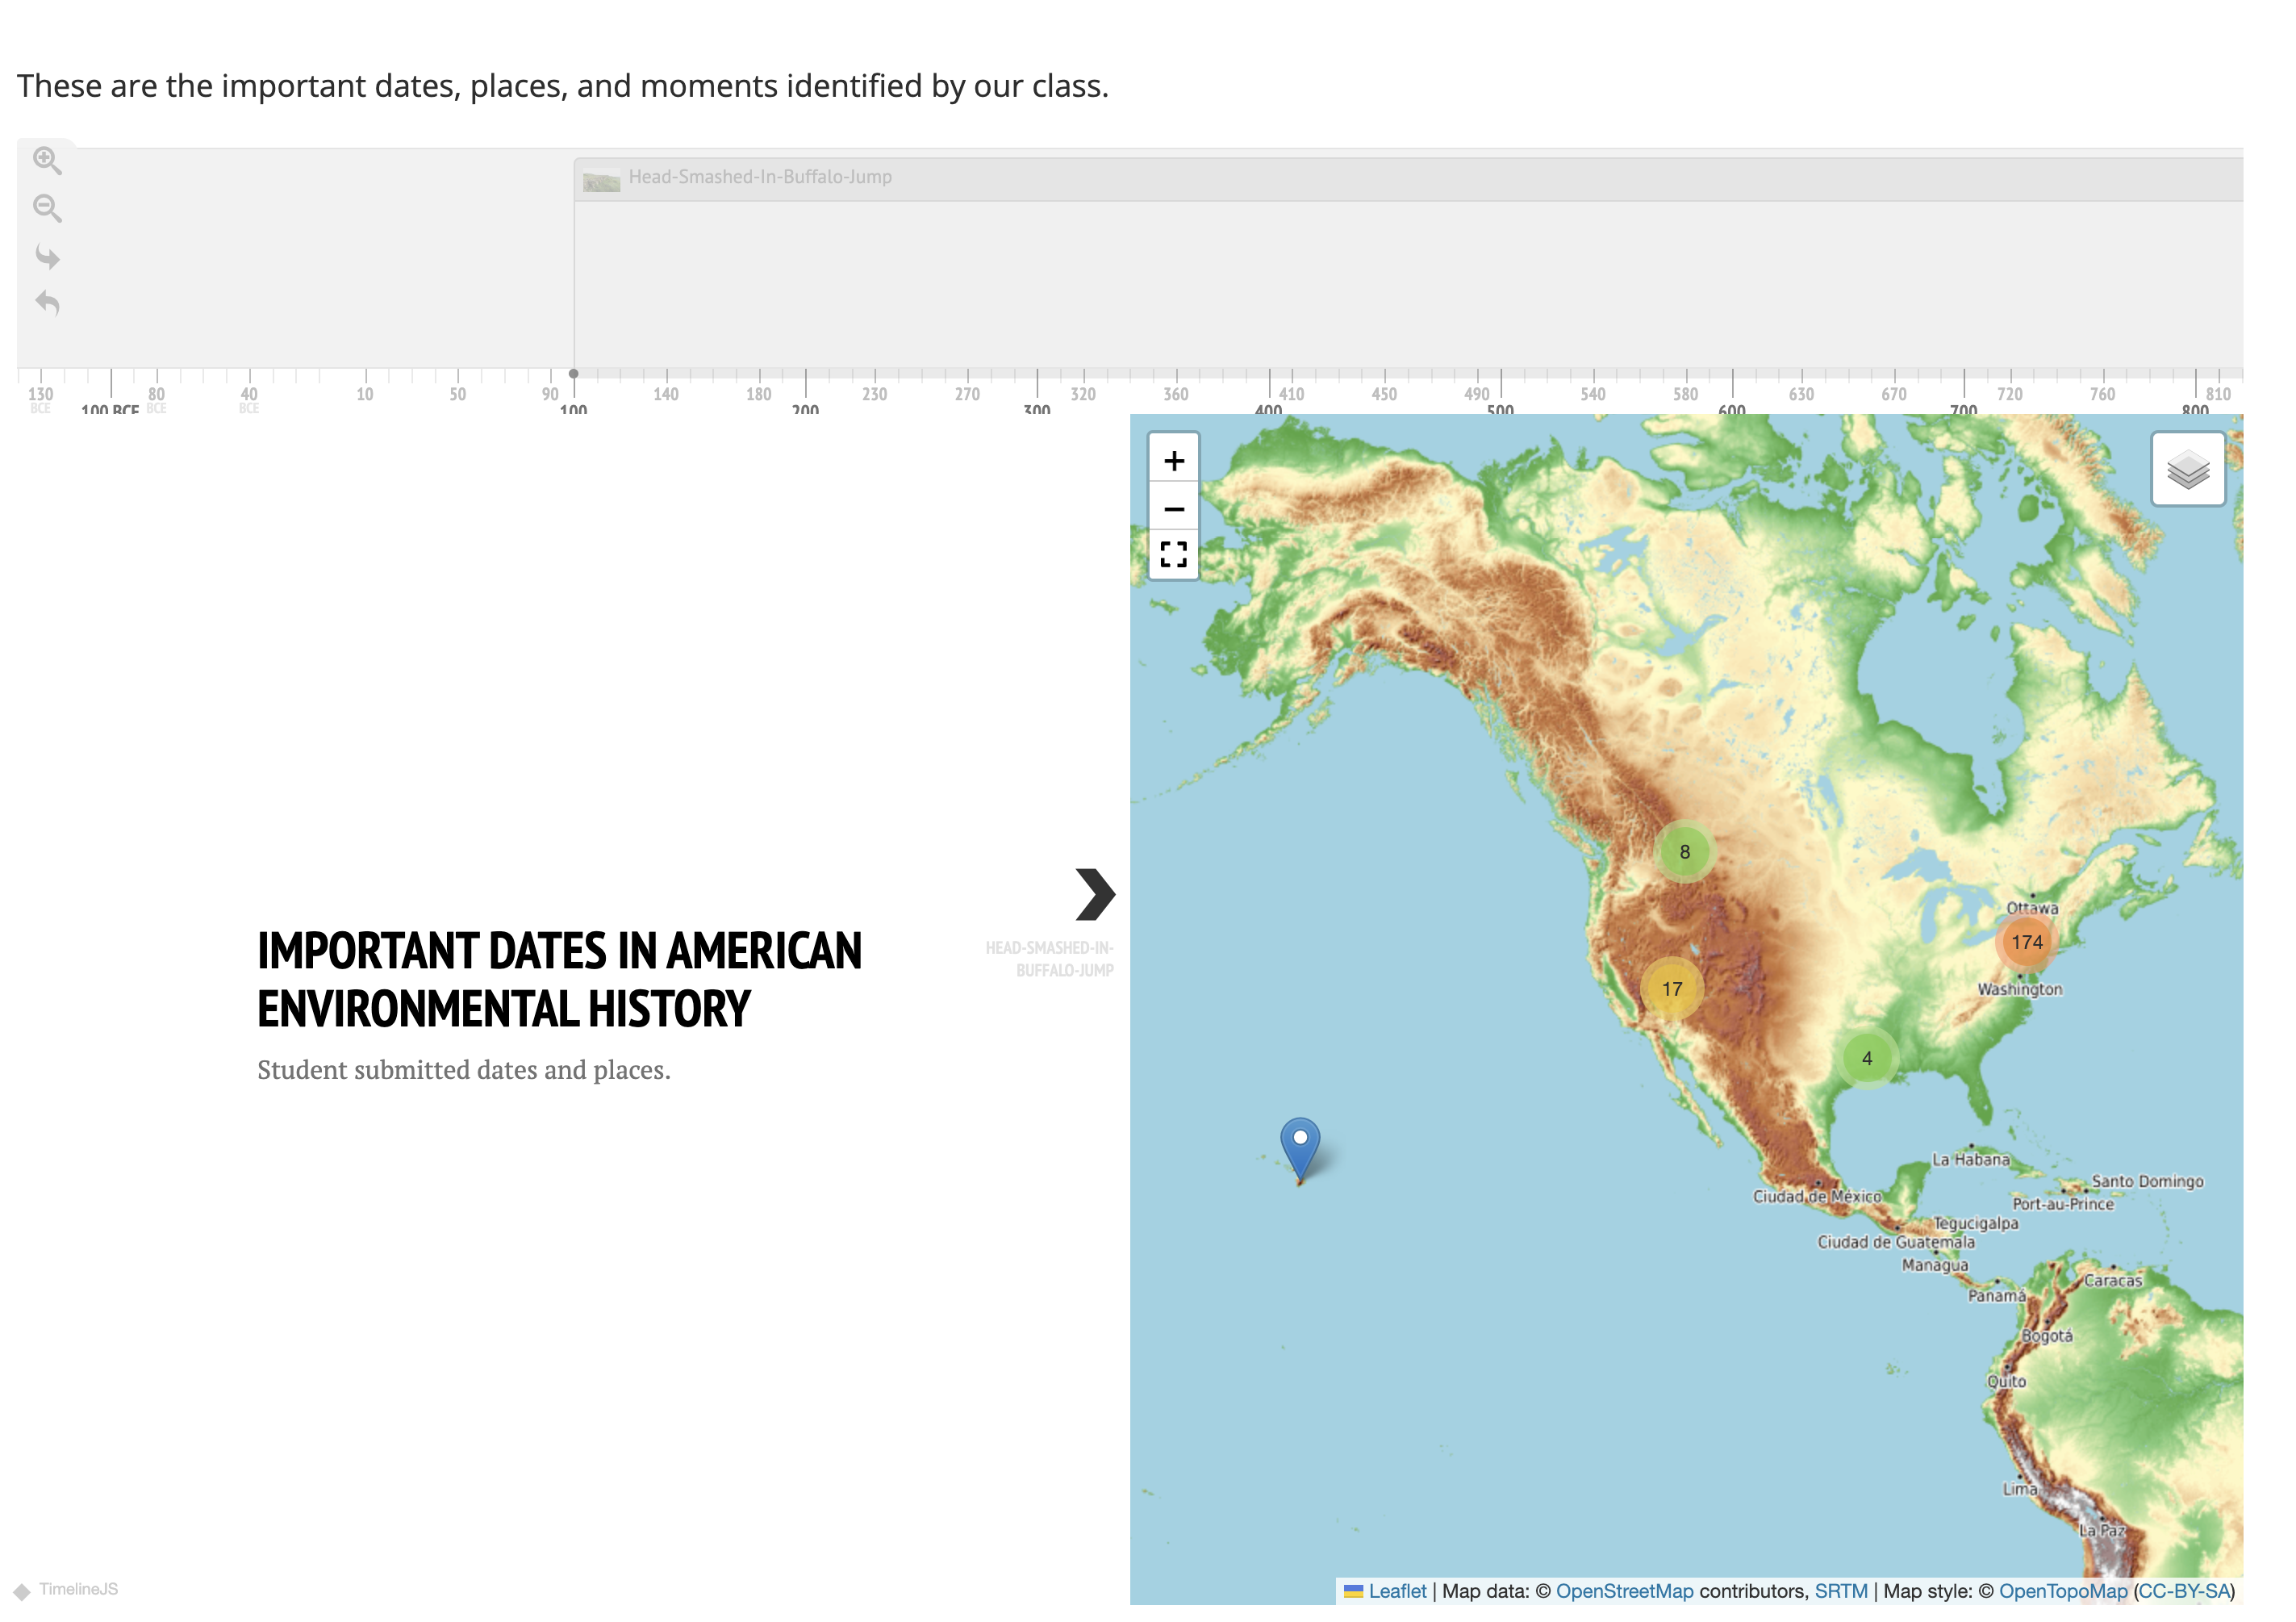
This is the area where you add your map title, sub title, and importantly, chose the date property of which the map will be able to function by displaying the items across the timeline appropriately.
Title Headline & Title Text:
Here's how the title and title (subtitle) text will appear on the page:
Fly to:
Select the map view from the dropdown to fly to when navigating between events. This is something that contributes to the animation as the minimum and maximum zoom levels. Experiment with this until you acheive your desired setting. The example shows "Event marker, zoom 8".
Show Contemporaneous Events:
Check this if you want to show all events on the map that exist in the same time period as the current event (default view only).
Timeline Navigation Position:
It is highly recommended to choose the option, "Full width, above story slider and map". It is the option that tends to display the best and is what is used in most Faculty & Student project examples.
Property:
Choose the property that cooresponds to what was chosen in your Resource Template. The choices are Date (numeric:interval), Date (numeric:timestamp), and Date Created (numeric:timestamp).
Query or Attachments
When you chose the page block, "Map by Query", you are choosing an item set that you previously made specifically for the items that you want to appear on your timeline and map. This is an idea choice if you have dozens of items that need to be mapped.
If you only have a handful of items that you want to manually put on a map, however, you can choose the page block, "Map by Attachments". All of the same settings are available as described above....you just get to hand pick which items go on your map.