Exhibit Management
These guidelines apply specifically to our new exhibition instance at Exhibits @ Schaffer Library . While many of basic building blocks of creating items and pages are the same, there are several new steps for creating an exhibit.
Steps for adding a new exhibit
What's new: Firstly, any new exhibit will have it's own "site" in the backend, even for just one page. Here's a step by step guide.
ADD New Site:
Click the “Add new site” from https://exhibits.schafferlibrarycollections.org/admin/site
ADD TITLE of your exhibit:
This is what will appear at the very top of the page, highlighted in garnet.
Important: If you have a particularly long title, and/or a subtitle that makes it over 50 characters long, please use the first half the title here. An example used for this is “Beyond the Hasheesh Eater: Fitz Hugh Ludlow, A Nineteenth Century Writer and Adventurer”. Just “Beyond the Hasheesh Eater” was used for the top title…and then the full title was used as the first heading on the page.
SUMMARY field:
Please follow this format: Start date of Exhibition - End date of exhibition + in the place of exhibition.
Example: "May 5th - September 1st, 2019 in the Beuth Atrium. Then press enter to start a new line to write a brief summary. Only the top line will be in bold in the summary, this is intentional.
Please limit it to around 500 characters or 80 words. https://wordcounter.net/character-count
THUMBNAIL:
This should be an image representing your exhibit that is exactly 200px by 200px.
Click Theme Tab and Finish Adding Site:
Under the Theme tab, select the sole theme available, “Freedom”.
MAKE SITE PRIVATE, for now. Click on the eyeball icon before the final step of clicking the “ADD” site button. This will keep it invisible to the public, until you have finished creating all of the content and pages that you need to.
Add Required CSS:
To style the site appropriately, put in the following style sheet link in the CSS editor: https://exhibits.schafferlibrarycollections.org/styles/Omeka_Exhibits_Freedom-theme_general-custom-styles.css
THEME COLOR:
To add a theme color to your site (this will be the color of the drop down menu and the footer color at the bottom of the site), go to THEME in the site menu. You can color pick any color you would like. Important: Please keep in mind that it should be a medium to darker color, as the text over it will be white. The contrast needs to be great enough for accessibility purposes.
BANNER:
Create a banner that is relevant to your site’s content. It could incorporate an image or a collage of images from the exhibit for example. It should be horizontal in orientation and a recommended dimension of 1280 x 560px. Please avoid uploading extremely large images with print-size resolution of 300. This slows down the loading of the banner and page.
HOME PAGE:
Click on “Pages” in the site’s admin menu. Click “Add new page” from the top right button. Important: Name the page the full name of the exhibit. For example: “Beyond the Hasheesh Eater: Fitz Hugh Ludlow, A Nineteenth Century Writer and Adventurer”.
NAVIGATION: Adding required Exhibits @ Schaffer link
Add a Custom URL link that links back to the main Exhibits home page: The label should read exactly: Exhibits @ Schaffer Library in the URL field, copy and paste this url exactly as shown: /s/exhibitions-at-schaffer-library
NAVIGATION: Adding the home page to the menu:
Click on “Navigation” in the site’s admin menu. Select the page previously created and entitled the exhibit name from the right column. Important: Click on the edit pencil icon of that page and rename the label to “Home”. Drag the page so that it’s first (on top) of the navigation list.
NAVIGATION: Browse link
The Browse link is only useful if the exhibit site has several items / images attached to it. If this is a one page site, it makes more sense to take out the Browse link from the navigation menu. If there are multiple pages or multiple items, leave it on.
NAVIGATION: Organizing multiple pages:
If your site has more than 6 pages or navigation links, it’s best to nest some of the pages underneath a top navigation link, so as not to present an overwhelming amount of choices to the visitor at once. The other reason for keeping the top navigation list short, is becuase if it's too long, a user on mobile view won't be able to scroll down and see all the options towards the bottom. A good example of this is a site like Brick by Brick. There are separate pages for different types of engineering, which were organized under a Custom URL in the navigation. To do this, once all of your pages are already created, you would select Custom URL, and add a # in the URL field, and label what you’d like. You would then drag the available pages over to nest underneath that Custom URL.
EXHIBIT DATE CIRCLE: Adding it correctly
For physical exhibits that have a start and end date, use the "exhibit-date-circle" class within an HTML block at the very top of the page in admin view. It's important to note exactly how to input the right format in order for it to display correctly. Please follow this format:
Month Date
to
Month Date
YEAR (a class named "year" needs to be added to the <p> tag in the source code)
Please refer to the following screen shots to follow the examples. Note in the source code, that the two dates are within the same <p> tag, and the Year is a separate <p> tag.


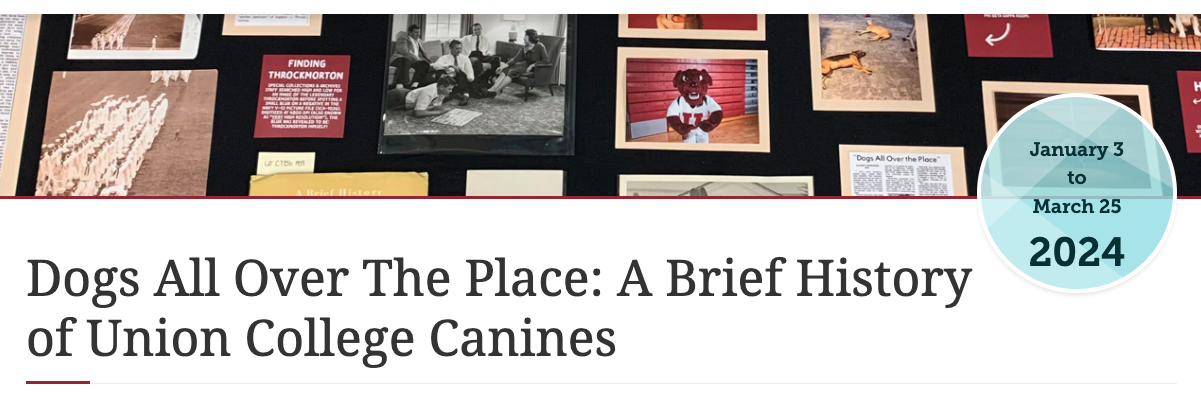
When finished, the Exhibit Date Circle should appear like the example below:

